My oh my... my poor abandoned blog! I left it untouched for a while because, well, I had nothing to talk about. I figured it was best to not say anything than to ramble on about nothing. Now, I have LOTS to talk about!!!
Shortly after my last post, Daniel and I found out we were pregnant! It was a bit of a surprise, but not something that we hadn't previously talked about. My next several posts will most likely be baby related since all of our current home projects have kind of been put on hold for now. For now, we will be working on the nursery and getting ready for this little one.
Even though it's a been awhile, I won't go back and update on what has happened up until this point. Honestly, it's been fairly boring until yesterday. Yesterday, we found out this little one is a BOY! I'll admit... I was really nervous and overwhelmed at first. I got in the car, and I cried. Before you run off calling me selfish and crazy, please understand I didn't cry because it was a boy. The ultrasound tech started our appointment off by telling us it was next to impossible to determine gender. Not because I wasn't far enough along, but because the way the baby was positioned. Right now, he's feet first and was squeezed between a braxton hicks contraction I was having. Who knew you had BH contractions so early?! Because of the contraction, the baby wasn't moving anywhere... it was impossible for him to move even if he wanted to. On top of that, his legs were crossed. After she took her measurements and showed us all the cool, growing baby parts, she went to his feet to try just one last time. By the grace of God, he managed to move in such a perfect position and uncrossed his legs so we could get a snapshot. There's no denying this baby is a boy... I can promise you that.
When we got in the car, I was so overwhelmed by the appointment (not knowing whether we would find out and then finding out last minute). On top of that, I kind of had a moment of panic because the "We're having a baby..." really settled. Of course I knew we were having a baby, but at that point... it was real. We were having a BOY, and soon we were going to have a name and a room and it was all becoming SO much more real than getting a positive on a pregnancy test.
I'll keep you updated on the nursery and all the other fun things that are coming up. Until then, hang tight :)

Friday, September 28, 2012
Saturday, June 16, 2012
How do you do that?!
Well, hello strangers!
I haven't posted in a while and for that, I'm sorry. I promise I'll try harder at this thing!!!
Daniel got a new job! He actually got it about a month ago and it's been GREAT so far. We've already been on a company outing to the Rangers game and it's been SO nice having him home on the weekends. Since we only have 1 car (still), his normal hours make it easier in the mornings/afternoons when it's time to go and leave from work. He's so much happier where he's at and I couldn't be more proud of him!
I also got to finish another project!!! YAY! This one wasn't on the list but it's been on my mind for a while. I wanted a shelf in the bathroom where I could store things, but it would also be functional... like a towel rack for instance. So, naturally, I built it. Imagine that. I get people asking me ALL the time "did you REALLY build that?!" or "how did you DO that?!" or "I don't think I could ever do that". Well, I'm here to tell you... YOU CAN!
In the past I always just posted the final product and moved on. Today, I want to post a little tutorial on how I did this project.
Here was my list of materials:
1- 1x8x4
1- 1x10x4
Shelf Brackets (I found mine in the millwork/moulding section)
Robe/Towel Hooks
1 1/4 Finishing Nails
Screws
Nail punch/setter
Wood Glue (not seen in photo)
Finishing supplies
Straight Edge/Ruler
Sanding tools (either a sanding block or a power sander)
Optional:
Saw (doesn't matter what kind... a power saw would make it easiest but you could use a hand saw if you wanted)

You can't see the wood in this photo because I forgot about it. As far as the length of the wood to buy, you need to measure your wall first and see what works.
1. Cut your wood to size.
This is pretty self explanatory. I had to buy 4' wood and cut it down to 3' to make it work on my wall. The reason I say the saw is optional is because Lowes and Home Depot will cut wood for you for free. If you plan on doing that, you need to make sure the length is EXACTLY what you want.
2. Assemble. Sorry, I didn't take a photo of the "during"... only once it was put together. Hopefully it makes sense!
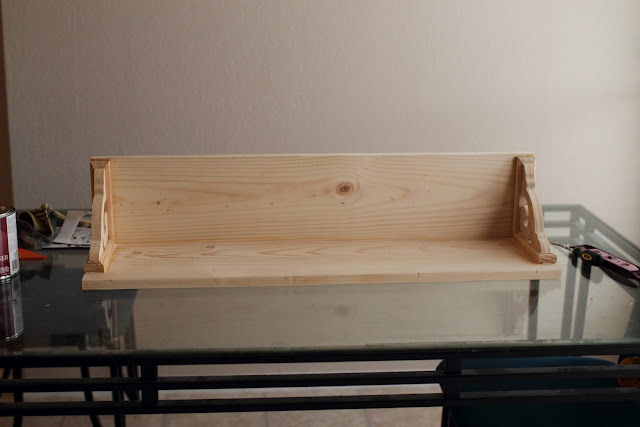
I used the 1x8 as the back and the 1x10 as the top. I liked the extra overhang that it gave for up top decorating/storage. Try it out in the store before you bring it home if you're not sure.
Using wood glue, glue the 2 brackets to your 1x8. I lined them up with the sides of the board and then the top of the board. Make sure everything is in line and straight. Let this sit for a little bit... maybe about 30 minutes??? Glue the 1x8 and the 2 shelf brackets to the 1x10. I made this easier by flipping the shelf so the 1x10 was flat on my table. Again, let it sit for about 30 minutes.
If you're going to stain this project, I DO NOT recommend applying glue around the edges. I read in several different places that wood glue is stainable if you sand it... well, I sanded and sanded and sanded and it didn't take the stain one bit. If you are a pro sander and know how to do it properly, go ahead... I'm not so mine didn't work when I stained it.
3. Nail.
Once the shelf is glued together, hammer in your finishing nails from the top of the 1x10 down into the shelf brackets and the back top of the 1x8. Again, I don't have a picture so I hope when you get your shelf together, you know what I'm talking about! You don't need a ton of nails since it's already pretty sturdy with the glue. I would say 2 in each bracket and maybe 4 or 5 along the back.
If you plan on painting this and want to fill these holes, use wood filler. I didn't since the holes are on the top where no one would see them but be my guest. If you plan on staining it, I would stay far away from the wood filler. Even the "stainable" kind isn't really stain friendly. They make colored wood putty that you can use or you can color your own.
4. Sand.
Take 120 grit sandpaper and sand the whole thing until smooth. Make sure you wear protection so you don't get it in your eyes. Dust it off, vacuum the creases, and wipe down with a damp cloth. Make sure there is NO sand/debris left.
5. Finish.
There are several ways you can do this so bear with me.
You can paint or stain this. Prime or use wood conditioner as needed. I spray painted this so it would be easier to get through those scrolls... it's a personal preference. Make sure to sand between coats and remove all dust/debris before moving on. Finish with polycrylic or polyurethane.
6. Attach your hooks and hang on the wall.
The screws that came with our hooks were longer than our board, so they poked through the back. We decided to just drill straight through the board into a stud in the wall to hang it, and then did the same with the hooks. It's not going anywhere. This was easiest for us. If you're renting, I don't recommend it since it will make several holes in your wall. They make mounting kits that you can use if you don't want to drill directly into the wall.
Take a step back and enjoy your finished product!!!

My very first tutorial! If you have questions, please do let me know :)

I haven't posted in a while and for that, I'm sorry. I promise I'll try harder at this thing!!!
Daniel got a new job! He actually got it about a month ago and it's been GREAT so far. We've already been on a company outing to the Rangers game and it's been SO nice having him home on the weekends. Since we only have 1 car (still), his normal hours make it easier in the mornings/afternoons when it's time to go and leave from work. He's so much happier where he's at and I couldn't be more proud of him!
I also got to finish another project!!! YAY! This one wasn't on the list but it's been on my mind for a while. I wanted a shelf in the bathroom where I could store things, but it would also be functional... like a towel rack for instance. So, naturally, I built it. Imagine that. I get people asking me ALL the time "did you REALLY build that?!" or "how did you DO that?!" or "I don't think I could ever do that". Well, I'm here to tell you... YOU CAN!
In the past I always just posted the final product and moved on. Today, I want to post a little tutorial on how I did this project.
Here was my list of materials:
1- 1x8x4
1- 1x10x4
Shelf Brackets (I found mine in the millwork/moulding section)
Robe/Towel Hooks
1 1/4 Finishing Nails
Screws
Nail punch/setter
Wood Glue (not seen in photo)
Finishing supplies
Straight Edge/Ruler
Sanding tools (either a sanding block or a power sander)
Optional:
Saw (doesn't matter what kind... a power saw would make it easiest but you could use a hand saw if you wanted)

You can't see the wood in this photo because I forgot about it. As far as the length of the wood to buy, you need to measure your wall first and see what works.
1. Cut your wood to size.
This is pretty self explanatory. I had to buy 4' wood and cut it down to 3' to make it work on my wall. The reason I say the saw is optional is because Lowes and Home Depot will cut wood for you for free. If you plan on doing that, you need to make sure the length is EXACTLY what you want.
2. Assemble. Sorry, I didn't take a photo of the "during"... only once it was put together. Hopefully it makes sense!

I used the 1x8 as the back and the 1x10 as the top. I liked the extra overhang that it gave for up top decorating/storage. Try it out in the store before you bring it home if you're not sure.
Using wood glue, glue the 2 brackets to your 1x8. I lined them up with the sides of the board and then the top of the board. Make sure everything is in line and straight. Let this sit for a little bit... maybe about 30 minutes??? Glue the 1x8 and the 2 shelf brackets to the 1x10. I made this easier by flipping the shelf so the 1x10 was flat on my table. Again, let it sit for about 30 minutes.
 |
| side view |
If you're going to stain this project, I DO NOT recommend applying glue around the edges. I read in several different places that wood glue is stainable if you sand it... well, I sanded and sanded and sanded and it didn't take the stain one bit. If you are a pro sander and know how to do it properly, go ahead... I'm not so mine didn't work when I stained it.
3. Nail.
Once the shelf is glued together, hammer in your finishing nails from the top of the 1x10 down into the shelf brackets and the back top of the 1x8. Again, I don't have a picture so I hope when you get your shelf together, you know what I'm talking about! You don't need a ton of nails since it's already pretty sturdy with the glue. I would say 2 in each bracket and maybe 4 or 5 along the back.
If you plan on painting this and want to fill these holes, use wood filler. I didn't since the holes are on the top where no one would see them but be my guest. If you plan on staining it, I would stay far away from the wood filler. Even the "stainable" kind isn't really stain friendly. They make colored wood putty that you can use or you can color your own.
4. Sand.
Take 120 grit sandpaper and sand the whole thing until smooth. Make sure you wear protection so you don't get it in your eyes. Dust it off, vacuum the creases, and wipe down with a damp cloth. Make sure there is NO sand/debris left.
5. Finish.
There are several ways you can do this so bear with me.
You can paint or stain this. Prime or use wood conditioner as needed. I spray painted this so it would be easier to get through those scrolls... it's a personal preference. Make sure to sand between coats and remove all dust/debris before moving on. Finish with polycrylic or polyurethane.
6. Attach your hooks and hang on the wall.
The screws that came with our hooks were longer than our board, so they poked through the back. We decided to just drill straight through the board into a stud in the wall to hang it, and then did the same with the hooks. It's not going anywhere. This was easiest for us. If you're renting, I don't recommend it since it will make several holes in your wall. They make mounting kits that you can use if you don't want to drill directly into the wall.
Take a step back and enjoy your finished product!!!

My very first tutorial! If you have questions, please do let me know :)
Tuesday, May 15, 2012
All quiet on the home front...
Oh my gosh... it's been 2 months since my last post. Ugh... I knew eventually I would get REALLY bad at this whole updating thing. Honestly, it's not that I've completely forgotten my blog, it's mostly that things have just been SO quiet I haven't had anything to talk about.
I did, however, complete one more item on my to-do list. I finally finished building my entry table. Sorry for the terrible iPhone pictures, but it's all I have at the moment. Once I get it all decorated I can post another photo.


I did, however, complete one more item on my to-do list. I finally finished building my entry table. Sorry for the terrible iPhone pictures, but it's all I have at the moment. Once I get it all decorated I can post another photo.

It's definitely not perfect by any means. This one was a lot of firsts for me and I had a LOT of hiccups. This table took WAY longer than it should have, but only because it was my 2nd build (my first was my ottoman) and I was learning. On top of that, I didn't have a nail gun so I had to hammer each nail by hand. If you're interested in building your own, see the instructions here. Ana makes it so easy to build and gives you pretty much everything you need to get started (other than the tools themselves of course :) ).
My next build is going to be my bed. You see, Daniel and I went out and bought this fancy schmancy, big, comfy, pillow top king mattress when we first bought our house. It's sat in our guest bedroom since. Yup, you heard me right. Our GUEST bedroom. Why you might ask? Well, mostly because we forgot to buy the box springs with it and it doesn't have a frame. My solution was to build the bed. Since we didn't have the bed, it just sat. Such a waste. So, once I build the bed we can move our still new mattress and finish up our bedroom!
I haven't been doing much practice with my camera lately, although I used it a lot back in April. I took some photos of my friend Lauren and her sister, Lindsey, and finally got to get some of my own family.

This little girl makes my heart smile :) She is just such a happy baby... always. Giggling, laughing, dancing, singing.

Such pretty girls :) I had a blast shooting with these two girls.
Hopefully I'll be able to update sooner than I did this time. I'll be keeping you updated with my bed since it's probably the biggest build I'll do (maybe hehe!).
Tuesday, March 13, 2012
Hello, Life!
I'm straying from the usual. Please don't freak out. :) This post has nothing to do with projects (well, maybe one). It has nothing to do with my house. Believe it or not, this post is about... life! *Gasp* I know. I've gone off the deep end and someone needs to save me from myself!
I haven't written in a while because I've been so caught up in life. I haven't touched or bought anything to do a single project or craft in two weeks. While it has absolutely KILLED me to have SO much time on my hands, it's been nice. I've read an entire book series (which was FABULOUS, by the way!). We've gone to birthday's... flag football games, and we went to the MOVIES on a DATE! Ok, this is getting out of hand! :)
Daniel finally got to build his beloved computer. It's huge and powerful. I'm not even exaggerating. He's going to be so proud when he see's me talking about his computer... it's his pride and joy... for now :). Of course, I had to shadow him with my camera while he was building it. I only got a few shots that actually turned out okay, but this is my favorite. It was actually my week 8 submission for the Let's Do 52 photography project, the theme was "Game On".

By the way... I know I'm behind on the pictures for the project, but you can go to my Flickr page to see all the photos I submit. I try to post them all, but sometimes I forget or can't really think of how to turn the photo into a blog post. They also get posted to Facebook, although I think I've forgotten a few times.
My week 9 submission was from my father-in-law's birthday party. I would post photo's from the party but none of them are watermarked and I am strange in that I like my photo's watermarked so people can't steal pictures of my family. Call me strange... I call it cautious :) Here's that photo.
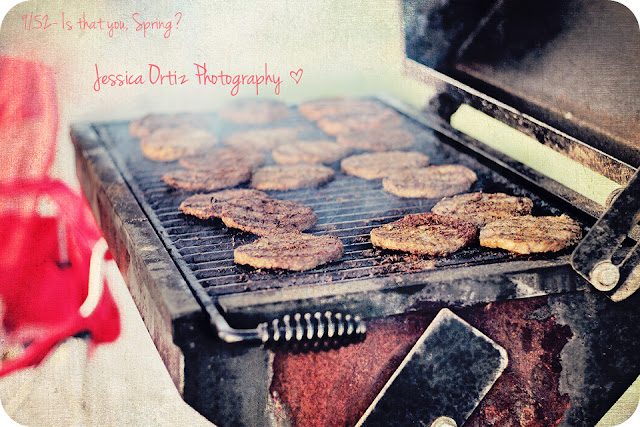
Is anyone else's mouth watering? YUM! Week 9's theme was "Is that you, Spring?" I live in Texas, and our "spring" usually only lasts a few weeks before we jump into summer. We've had a really easy winter though, so 70 degree weather was nothing unusual. We spent the day grilling burgers, flying kites, and the kids got to run around and play sports.
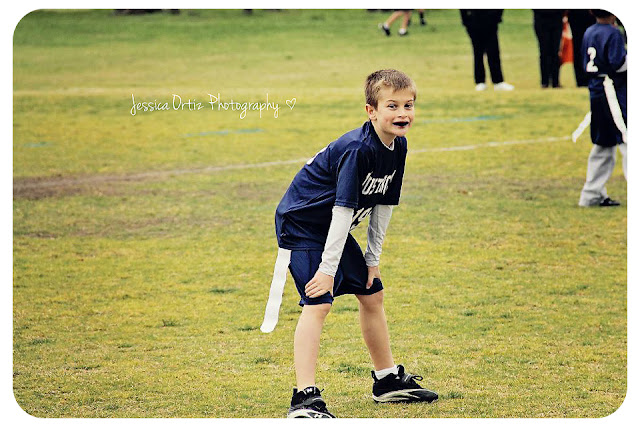
Week 10 submission was from my nephew's flag football game. I know I say this every time but I can't believe how much he's grown. My favorite memories of him when he was little were when I was in drill team and he would come to my games. He was my biggest fan and, at three years old, would stand in the crowds and cheer along with everyone else. He knew our chants and cheers, our songs and traditions. He intently watched every game and knew when they did good and when they didn't. Now, he's 9 years old and plays flag football in the spring and tackle football in the fall. I can't help but giggle when he takes off running and does all those crazy football player moves to avoid defenders. I still see him as that three year old in the stands :)


I haven't written in a while because I've been so caught up in life. I haven't touched or bought anything to do a single project or craft in two weeks. While it has absolutely KILLED me to have SO much time on my hands, it's been nice. I've read an entire book series (which was FABULOUS, by the way!). We've gone to birthday's... flag football games, and we went to the MOVIES on a DATE! Ok, this is getting out of hand! :)
Daniel finally got to build his beloved computer. It's huge and powerful. I'm not even exaggerating. He's going to be so proud when he see's me talking about his computer... it's his pride and joy... for now :). Of course, I had to shadow him with my camera while he was building it. I only got a few shots that actually turned out okay, but this is my favorite. It was actually my week 8 submission for the Let's Do 52 photography project, the theme was "Game On".

By the way... I know I'm behind on the pictures for the project, but you can go to my Flickr page to see all the photos I submit. I try to post them all, but sometimes I forget or can't really think of how to turn the photo into a blog post. They also get posted to Facebook, although I think I've forgotten a few times.
My week 9 submission was from my father-in-law's birthday party. I would post photo's from the party but none of them are watermarked and I am strange in that I like my photo's watermarked so people can't steal pictures of my family. Call me strange... I call it cautious :) Here's that photo.

Is anyone else's mouth watering? YUM! Week 9's theme was "Is that you, Spring?" I live in Texas, and our "spring" usually only lasts a few weeks before we jump into summer. We've had a really easy winter though, so 70 degree weather was nothing unusual. We spent the day grilling burgers, flying kites, and the kids got to run around and play sports.
Week 10 submission was from my nephew's flag football game. I know I say this every time but I can't believe how much he's grown. My favorite memories of him when he was little were when I was in drill team and he would come to my games. He was my biggest fan and, at three years old, would stand in the crowds and cheer along with everyone else. He knew our chants and cheers, our songs and traditions. He intently watched every game and knew when they did good and when they didn't. Now, he's 9 years old and plays flag football in the spring and tackle football in the fall. I can't help but giggle when he takes off running and does all those crazy football player moves to avoid defenders. I still see him as that three year old in the stands :)

Now the roles have switched. That's me at his game taking pictures, being his biggest fan (aside from his mom, of course :) ). Week 10's theme was "perfect pair".


Oh, and I mentioned the book series and the movie earlier??? The book series is Vampire Academy by Richelle Mead. Yes, it's a vampire/forbidden love/teen romance novel. Don't remind me that I'm not a teenager anymore... I can't help it, it's addicting! I just finished the series last night and I love it. It was a little more "real" to me than Twilight was. I'll admit... the first book kind of had me confused. It didn't draw me in the way I'd expect the first book of a series to, but nevertheless, I pushed on and bought the second one. It was the second book that drew me in.
The movie we saw was John Carter. It. was. fantastic! I have a feeling there's going to be a second one based on the way they left it, and I'm stoked if they do!
Saturday, February 25, 2012
Checking my list...
For some reason I've had the Christmas jingle "Santa Claus is Coming to Town" stuck in my head all day. We JUST had Christmas so I don't know what's going on but, I thought maybe using part of it for my title would make it go away.
So, I promised I'd post some pictures when I finished some of my projects. Remember my list post? Well, I'm finally knocking it out.
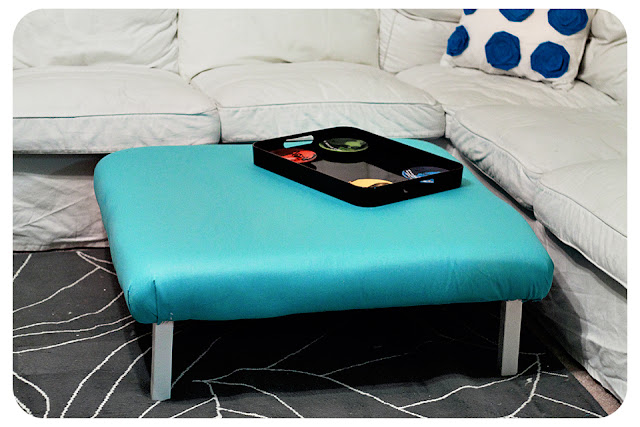
#2. Build Ottoman. DONE! Here's some pictures!


So, I promised I'd post some pictures when I finished some of my projects. Remember my list post? Well, I'm finally knocking it out.
#2. Build Ottoman. DONE! Here's some pictures!


I know it's nothing fantastic, but it was my first build using nothing but wood boards and screws. I did take pictures along the way just in case anyone was curious how I did it and wanted some kind of tutorial... or if I decided to do it again and needed reference. Oh... and that pillow in the background? I sewed that as well. The blue looks really deep and royal but it's just a darker turquoise. I haven't finished ALL of them so I can't check that off the list, but I do have step by step pictures for that too :)
#7. Sunburst Mirror. DONE!

This beauty is hanging right as you walk in and will be above the entry table I'm building next. I'm still not sold on the location, but I think it's because the white blends in too much with the light wall. Guess I need to start shopping for wall paint for the entry/hallway? Like the ottoman and pillow, I do have step by step on this if anyone is curious how I did it, but you can also check here and here. They both have fantastic instructions on how to make it, and one of them even offers a downloadable template to make it even easier!
As far as #5... Hemming and painting curtains... I've given up on that. I've tried twice now and both were huge failures. The first time I painted the curtains, it turned out BEAUTIFULLY. Except for when I went to admire them in the light and realized I let them dry (paint and all) to the cardboard I was using and it wouldn't come off. Lesson's learned... use plastic :) The second time I decided to try a spray fabric paint and it was just an epic fail. The spray can kept sputtering and spewing paint out, so it was really blotchy and uneven. It seeped under the painters tape... it was just a mess. So, I've decided to just order some pretty chevron fabric online and hem it and hang it like a curtain. Easy enough.
This wasn't on my "to-do" list but... anyone remember the post with the pictures of my gallery wall and the office? Well, my next step was to finish the chevron print. The chipboard ended up not working out so I just used some contact paper I had laying around to create vinyl lettering. It took FOREVER to finish but I love it now that it's done :)


By the way... those are our wedding vows in case you can't tell. They weren't personalized, but when our pastor gave us a choice between this one and the more traditional one, I almost cried I loved it so much. There have been so many times I've said these words to Daniel, before we even got married. It's a nice reminder to walk by everyday :)
Monday, February 20, 2012
One man's trash is another man's treasure
Well, I promised myself I would keep up with this blog and here I am almost a month later writing a new post. Sorry! Life took over and it's been a little crazy in the Ortiz household.
Daniel got a promotion! YAY! I'm so proud of him :) Many of you probably don't know the Daniel I knew in high school. If you did, you'd know he's a completely different person... in a good way. He's really come far and has accomplished so much in just the past few years. I could really get into it, but I'm just going to leave it saying I'm extremely proud of him and proud to have him as my husband and best friend :)
My last post was a loooonnnggg list of to-do's around the house. I'm happy to say I've finished 2 of those things. Well, ALMOST finished. Yeah... I'm at the 99% and having a hard time pushing through. The ottoman is built and covered... I'm waiting on the fabric I ordered to come in so I can completely finish it. The mirror is also done, but I have yet to hang it. Why? I can't figure out where to put it! I had this great idea of it going in our living room on one of our grey walls (once I paint) and it just looked absolutely FABULOUS! When I finished, I went and put it up against the wall and HATED it! So now it sits on our dining room table just waiting for a home. Oh, and I WILL be posting pictures (and maybe some step by step photos since I took them) once I figure it all out.
I know it's been a while since I've posted about this, but does anyone remember the photography project, Lets Do 52!, I've been blabbing about? Well, this week's theme was "Pretty Ugly"... finding beauty in things that others perceive as ugly or less than desirable. Years ago my mom acquired these older 35mm SLR camera (I won't get into HOW she acquired them) and they have been sitting in her need-to-sell eBay pile. Since I've recently decided to dive into photography, she brought them out the other night to show me. I fell in LOVE! They're old, dirty, scratched, and probably don't even work but I love them. Honestly, the only film cameras I ever played with were disposable ones or the cheap plastic kind from Wal-Mart. I never even knew lenses existed and there was a such thing as changing the settings on your FILM camera to create any kind of special effects. I always just thought "point, shoot, take it to walgreens to have them printed, and laugh at all the bad pictures you took." What fascinates me about these cameras is you really had to have an eye for photography and KNOW what you were doing. You couldn't lean on Photoshop and post processing as a crutch if you screwed up.
Anyway.... here's the picture I took of my "pretty ugly" trash.

I'm making some pretty hefty promises here, but I WILL be posting my projects and maybe the to-do's if its worth it. If there's something specific you're curious about, I'll post it.
Wednesday, February 1, 2012
A lonnnggg list...
I thought I would break away from the photography project and write about something else. My house, maybe? I gave you guys a sneak peek earlier into the office... which I know is probably the least interesting room in the house. Wanna know why I haven't posted any other pictures. Here's why.


My House To-Do List:
Living Room
1. Finish pillows
I have been on this DIY kick for quite some time. It doesn't matter WHAT the project is, I think I can do it cheaper if I just do it myself. (Thanks Pinterest!) I had a bunch of fabric laying around that I had bought years ago to make pillows. I don't know why because, up until a few days ago, I didn't even know how to sew. My mom let me borrow her sewing machine (thanks Mom!) and now I'm on a rampage to finish these pillows.
And again... enter pinterest. Not only do I think I can DIY everything, but I'm pretty convinced I can BUILD it too. So, I'm going to start by building a storage ottoman for our living room. You'll notice while going through this list that the builds get bigger and bigger... I have already enlisted my Dad in help with this department since he's the builder.
3. Drop speaker wires and run electrical to hide TV wires
I think my eye is twitching just thinking about it. On to the next.
4. Paint
5. Hem & paint curtains
Again with the DIY. I think my husband MIGHT have a DIY intervention on me soon... if he invites you, please decline... I don't have a problem :) UPDATE: after numerous failed attempts at painted curtains, I decided to go a different route. I'll post when I'm done :)
6. Art
More specifically... sunburst mirrors :) Like these!

If you're following me on pinterest, you know I have plans for these in my own. I've had my eye on these for YEARS. Specifically since 2009 when Daniel and I were looking at apartments and I saw one in the model. I've loved it since but I do NOT love the price tag on these babies. Mine WILL be cheaper :)
Bedroom
1. Build my bed
Remember when I said the builds got bigger? Yeah... I'm ambitious to build my own bed. From scratch. With my own two bare hands... and the help of some power tools :)
2. Window seat cushion/pillows
Our bedroom has this cute little bench seat area by the window. Daniel REALLLYYY wants cushions and pillows for that area. Yes Daniel... not me.
3. Pillows for the bed
4. Mirror
5. Art
6. New dresser
I love Ikea... but... I've come to realize that unless you buy the big bulky stuff, their furniture looks like dollhouse furniture in a house. Sure it may fill an apartment nicely, but when we moved into the house, I felt like our furniture was miniature size. Besides... this dresser has been falling apart for years.
7. Organize!!!
8. New fan
Has anyone tried painting a ceiling fan? The fan is in perfect condition minus the ugly gold/brass. Let me know how that works.
9. Fix the bathroom doors
10. Patch the holes in the ceiling
This sounds WAY more dangerous than it is. Simple fix... but yet, WHY haven't I done it?!
11. Nightstands
Again with the IKEA furniture...
12. New lamps
13. Paint
I get REALLY lost here. I know I want dark brown. That's about it. I can't decide if I just want to paint an accent wall so I don't make my room look smaller with such a dark color?
14. Rug
15. Figure out WHAT to do with the extra space
I'm not implying that every corner has to be filled with something, but it also needs to have some flow and something other than a bed and nightstands. I've seen where people put chairs and a small table, like a reading area, in their bedrooms. I'm not sold.
Rest of the house
1. Clean out the guest bedroom
3. New dining room table
4. Fix the french doors to the office
5. Backsplash in the kitchen
6. Hardware for the kitchen cabinets
7. New disposal
8. Frame the bathroom mirrors
9. Dining room shelves
10. Sand and stain patio table
I know it looks like I haven't done anything in that house, but I promise I have. As a matter of fact, the living room is almost done despite the list above. A lot of things we're waiting until we have everything put up and decorated... like painting and some of the new furniture. Daniel is only letting me do one room at a time so I don't overwhelm myself. He's right... I do that and then I don't finish anything at all. Once I'm done with some of these things I'll start posting pictures. If anyone has any ideas on ANYTHING above... they're always appreciated.
Oh... and sorry for the long post. I can't help it :)
Monday, January 30, 2012
Sparkle!!!
Week 4 of the 52 project's theme was a choice between "Unexpected Perspective" and "Sparkle". I originally had this idea of using my niece and her pink sparkly shoes I got her for Christmas (I wish I had a picture... they are SOO cute!!!) and taking some kind of angled shot... something other than the straight, head on norm photos. Then Saturday rolled around and I realized I had yet to take my photo for the week and I needed to turn it in that night in order to be considered for the pick of the week photo!
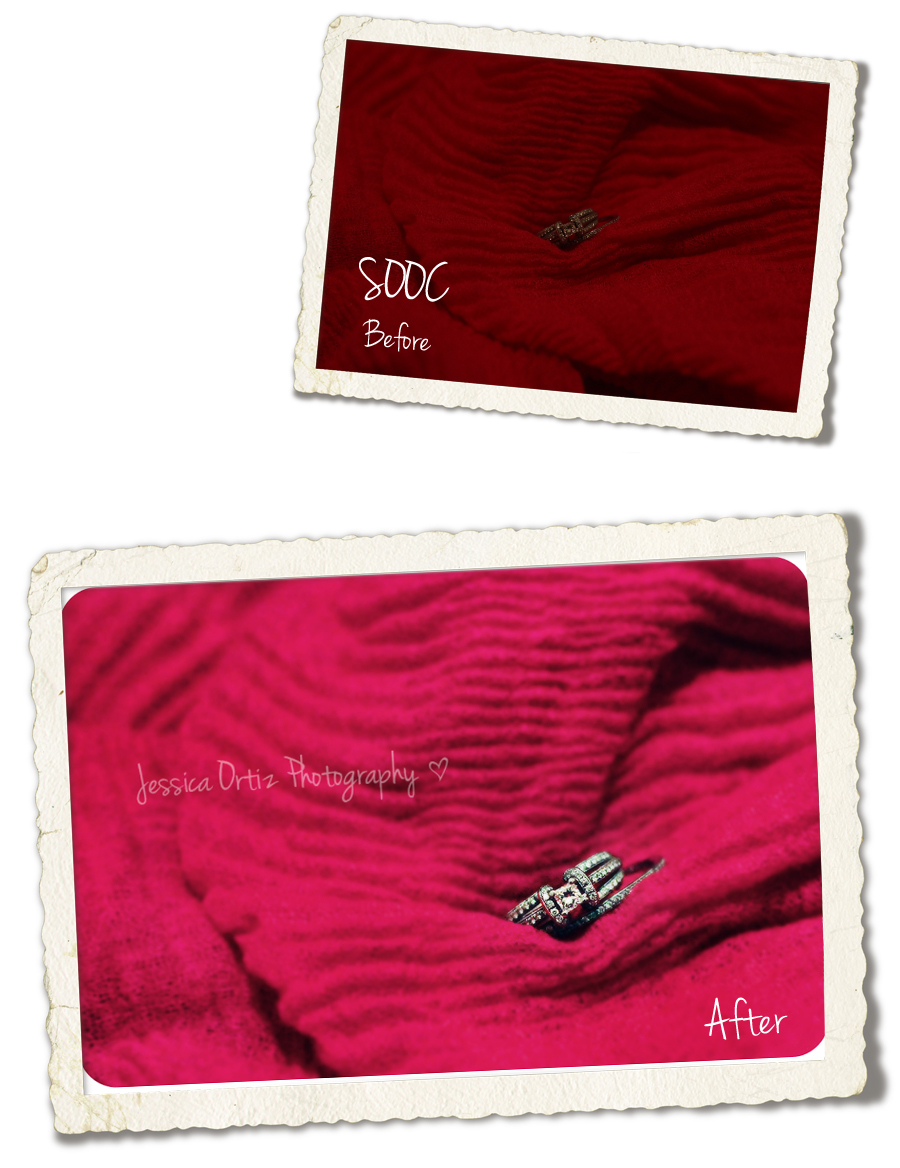
I rushed around town picking up anything sparkly... glitter, gems, beads, anything I could find for cheap (believe it or not, I had NONE of this at home). After playing with different shots of my hot pink wedding shoes, glitter, and gems... I had 10 different shots of the same thing. There was not a single picture that I was just in awe over. Not one single picture that I impressed myself with. On the verge of giving up, I tried one more thing. This is what I came up with for week 4.

I got a TON of pictures of my ring from my wedding pictures, so this was definitely not a picture I took to make up for lack thereof. This was merely a picture out of desperation to finish on time and I looked down and realized I had something sparkly on my hand and would be easy to photograph! :)
The pink background is actually a scarf I got for Christmas. The actual scarf is close to highlighter pink, so I toned it down quite a bit. I really love this picture. I love the simplicity of it... I love the color. I'll be posting the before picture later tonight since it's on my home computer and I forgot to email it to myself. DUH!
2/4/12 Edit:
Here's the before/after picture I promised. Oh... and I promise this is real :)

Enjoy!
I rushed around town picking up anything sparkly... glitter, gems, beads, anything I could find for cheap (believe it or not, I had NONE of this at home). After playing with different shots of my hot pink wedding shoes, glitter, and gems... I had 10 different shots of the same thing. There was not a single picture that I was just in awe over. Not one single picture that I impressed myself with. On the verge of giving up, I tried one more thing. This is what I came up with for week 4.

I got a TON of pictures of my ring from my wedding pictures, so this was definitely not a picture I took to make up for lack thereof. This was merely a picture out of desperation to finish on time and I looked down and realized I had something sparkly on my hand and would be easy to photograph! :)
The pink background is actually a scarf I got for Christmas. The actual scarf is close to highlighter pink, so I toned it down quite a bit. I really love this picture. I love the simplicity of it... I love the color. I'll be posting the before picture later tonight since it's on my home computer and I forgot to email it to myself. DUH!
2/4/12 Edit:
Here's the before/after picture I promised. Oh... and I promise this is real :)
Enjoy!
Sunday, January 22, 2012
White (Negative) Space and a "put-together" space (finally!)
So, this is a dual post. First I'm going to share with you my submission for this week's Let's Do 52 project hosted by Paint the Moon Photography and then I'm going to share with you the first, and so far only, room in our house we've completely 100% finished. Yes, I know... you're probably thinking "only ONE room?! You've lived there for a MONTH!" In my defense, during that month we had Christmas, Christmas parties, birthday's, New Years, plus fantasy football... and you know that trumps all on our Sunday afternoons :) Back to the post.
So, we are in week 3 of the 52 project. Why yes, Captain Obvious, I have only submitted one week. I couldn't come up with anything for last week, so I skipped it. *slap on the hand* let's move on. This week's theme was White (or negative) Space or Everyday Tools. Once again, I combined them. My "everday tool" I shot was my morning cup of coffee. I used one of my fiesta ware cups I got as a wedding gift because I just LOVE the color. Here is my submission.

I have to say... I kind of love what I came up with. I love the vivid color, and the crisp white of the background contrasting with the shadow. Although it may not appear to be, but this picture was taken at night under a lamp on my beautiful new media cabinet (we'll get to that beauty later!). Surprisingly, THIS picture taught me SO much about photoshop. I learned how to REALLY edit color and contrast, and how to make pictures warmer and cooler without using the auto buttons that I have relied on for so many years. It really took me out of my box to edit this photo... believe it or not. Sometimes it's hard to see all the work and editing that goes into pictures... even one as simple as this. Let me show you with a before and after photo.


There's the chevron print I posted on Facebook a few days ago! I finally got my Cricut in the mail the other day, so once I get the chipboard, I'll finish that project and be done with it. Oh... and please don't hate on me for having the photos that came with the frames. I haven't had a chance to get my wedding photo's printed yet and at least they're artistic enough to be pleasing. Dont hate.
2/25/12 UPDATE! I finished the chevron print. Here it is :)
Next week's theme is Unique Perspective or Sparkle! I'm SO excited for this week so I'll definitely be posting my submission next week! Any idea's for photos? Comment and let me know :)
So, we are in week 3 of the 52 project. Why yes, Captain Obvious, I have only submitted one week. I couldn't come up with anything for last week, so I skipped it. *slap on the hand* let's move on. This week's theme was White (or negative) Space or Everyday Tools. Once again, I combined them. My "everday tool" I shot was my morning cup of coffee. I used one of my fiesta ware cups I got as a wedding gift because I just LOVE the color. Here is my submission.

I have to say... I kind of love what I came up with. I love the vivid color, and the crisp white of the background contrasting with the shadow. Although it may not appear to be, but this picture was taken at night under a lamp on my beautiful new media cabinet (we'll get to that beauty later!). Surprisingly, THIS picture taught me SO much about photoshop. I learned how to REALLY edit color and contrast, and how to make pictures warmer and cooler without using the auto buttons that I have relied on for so many years. It really took me out of my box to edit this photo... believe it or not. Sometimes it's hard to see all the work and editing that goes into pictures... even one as simple as this. Let me show you with a before and after photo.
Now do you see? Magic! :)
Now that I've bored you with pictures of my coffee cup, lets move on to my house! I know, yippee!!! So, the one and only room I'm going to show you is.... *drumroll*... the office. I know... even more boring than the coffee cup. Sorry. It was the easiest one to put together and I feel like I've really let you down with NO house pictures. Here's a few of the office with the new posters I had framed and printed for Daniel's Christmas present (he loved them!)


Well, these pictures aren't quite as pretty as the coffee cup, but I wasn't really too interested in editing photos of my home at 2 am. Again, sorry. Daniel decided he wants nothing but black and white in "his" room (shocker!). It's probably to counter all the "color" I put everywhere else. Borrrinnnggg. Don't you LOVE those posters though?! The middle one is a print my company handed out to us to celebrate the release of our very first game, Orcs Must Die! That particular image actually won an award. Yay Robot! He has two more of those posters coming, which will fill the gaps above the Mavericks poster and below the Jordan poster. We're still working on the desk and the organization, but the room is clean and functional and probably as decorated as Daniel will allow for now.
Oh... I forgot. I also have two pictures of my gallery wall I'm 99.9% finished with. Enjoy.


2/25/12 UPDATE! I finished the chevron print. Here it is :)
Next week's theme is Unique Perspective or Sparkle! I'm SO excited for this week so I'll definitely be posting my submission next week! Any idea's for photos? Comment and let me know :)
Saturday, January 7, 2012
Let's Do 52...
Happy New Year!!!
Now that the holidays are over, I can really start focusing on getting our house together... finally. I promise I will be posting pictures of the house VERY soon, but for now, I want to introduce you guys to one of the new years resolutions I've made.
It's called Let's Do 52 and it's a project held by Paint the Moon Photography and blogger. Her photography is amazing and she also sells some really fantastic photoshop actions if you're in the market. As you know, I've decided to fulfill a dream I've always had and dive into the photography world. I haven't quite worked up the courage to a dive, though... I'm still swimming in the kiddie pool, but I'm getting there :)
One of my New Years resolutions is to really improve my photography and editing skills... learn new things whether by internet or by taking classes. I spent most of 2011 worrying about other people and everyone else's life that I lost track of my own and never took time out for me. Because of that, I'm using this photography project as a way to spend time on something I love to do and really enjoy the art of photography.
This is the first week of the project and I'm already excited. Basically, each week you are given two themes to choose from. You go out, take a picture based on the themes, edit it, and post it. The theme is not black and white by any means and can be interpreted in any way you want it to be. This project is really about finding out YOUR style and it's really based around YOU and not throwing you into a little box. This week, the two themes were Sharing and Natural. This is the picture I submitted for this week's theme.

By the way... I know it says Jessica Ortiz Photography, but I have in no way created a business out of this. I put that on there only as a watermarking tool to keep people from stealing my images. That was the first thing that popped in my head so if you have a more creative idea, I'm all ears :)
I love this picture. Love love LOVE it! If you have children, you understand the beauty of this picture and why it falls under the "natural" theme. Actually, this picture just happens to fall into both themes. While I was out shooting for my niece's 1st birthday photo's, I decided to let her see the pictures I was taking. Realizing I had made a HUGE mistake in sharing my camera, I decided to hide the camera from her since her button pushing and prodding was getting a little out of hand. This was the result. I was in the middle of trying to get a family picture and she.just.broke.down. I felt terrible taking this shot, but now, I love it so much it's definitely become a favorite of mine.
As far as the theme, I decided to take the Natural theme a different way. Although natural tends to lean towards nature and landscapes, I thought this picture fit better into the theme than any landscape picture. The natural reaction to my not sharing my camera with her... it's just priceless.
For those of you photographers that are interested in this project, you can click on the link I provided above to join. It's really easy and free. :) Here's a button to take you to the project as well... Enjoy!
Subscribe to:
Posts (Atom)